Ever found yourself frustrated with a grinder that just won’t churn as smoothly as it used to? Or maybe you’ve noticed the flavor of your ground weed isn’t as potent as it should be? You’re not alone. The culprit is a grinder in dire need of cleaning. Whether it’s a high-end grinder or a basic plastic one, keeping it clean is crucial for a premium smoking experience.
In this guide, we’re diving deep into the hows and whys of keeping your weed grinder in tip-top shape. We’ll cover everything from why regular cleaning is a must, to the best methods for tackling stubborn plant residue in both metal and plastic grinders.
We’re talking about getting rid of every speck of leftover weed, ensuring a clean grinder for a consistent burn every time.
For those who take their cannabis seriously, a clean grinder is more than just a preference; it’s essential. Think about it – a dirty grinder can lead to ineffective grinding, a mix of old and fresh plant material, and even affect the taste and potency of your weed. That’s why understanding how to clean your grinder, whether it’s dealing with a metal grinder’s resilience or a plastic grinder’s delicacy, is key.
Understanding Your Grinder
Types of Weed Grinders
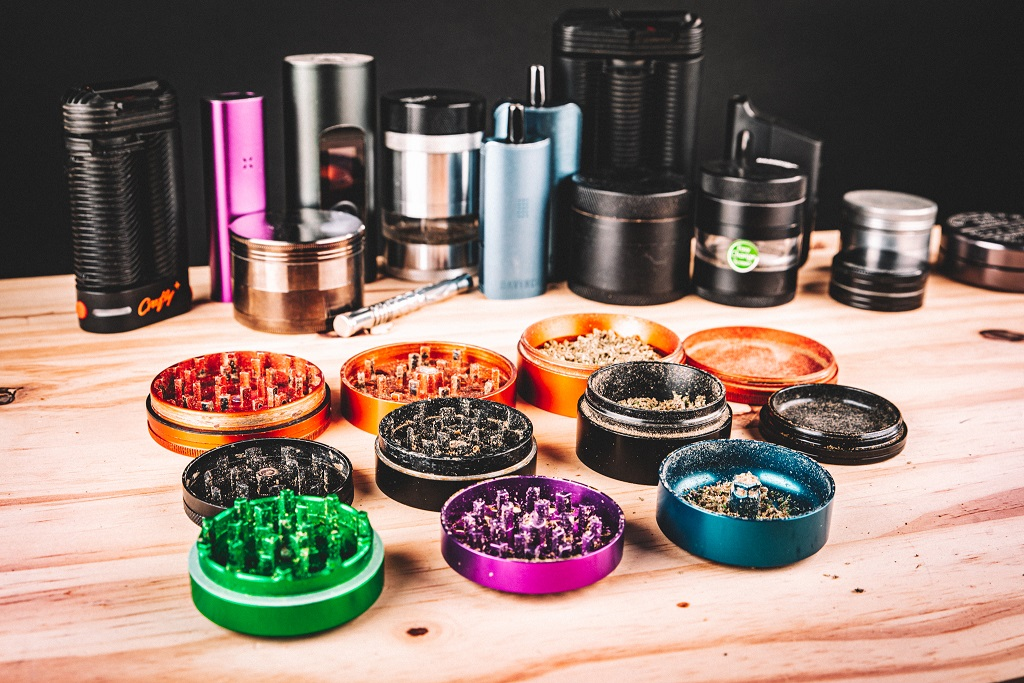
When it comes to grinders, not all are created equal. The material of your grinder can significantly affect both your grinding experience and the longevity of the tool. Let’s break down the two most common types: metal grinders and plastic or acrylic grinders.
Metal Grinder
These are the heavy-hitters of the grinder world. Crafted from durable materials like aluminum or stainless steel, these grinders are known for their sturdiness and efficiency. They usually come with sharp, diamond-shaped teeth that make grinding a breeze, turning your buds into finely ground weed in no time. A well-made metal grinder can last for years, even with regular use.
Plastic or Acrylic Grinders
These grinders are the budget-friendly option for the casual user. Lightweight and often colorful, these cheap grinders are easy to handle and great for those on the go. However, they’re not without their downsides. They tend to wear out more quickly than steel grinders, and their teeth can become dull over time, making grinding less efficient. Also, they may not give as fine a grind as their metal counterparts, which can be a deal-breaker for those who prefer a finer consistency.

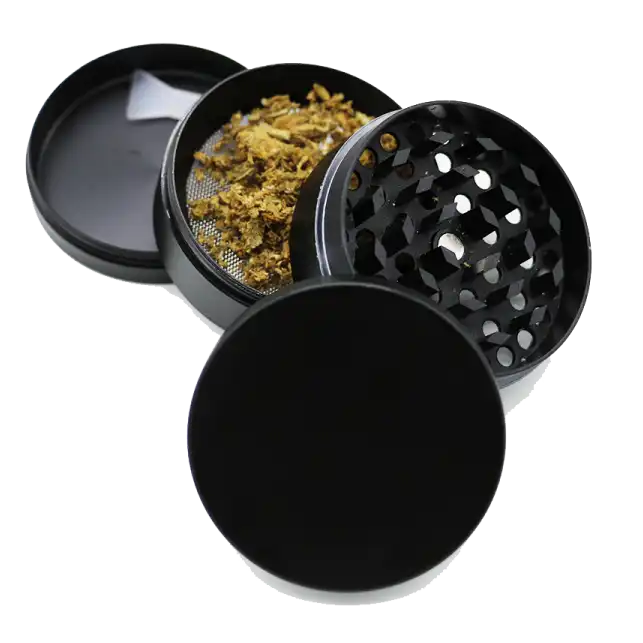
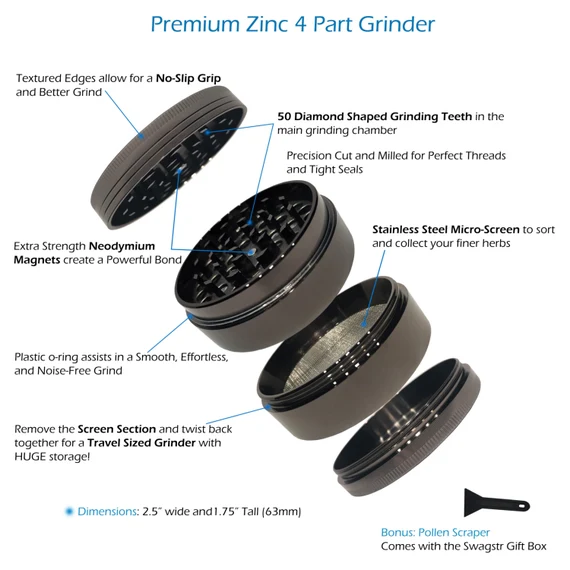
Components of a Grinder
Grinding Chamber: This is where you place your weed. It’s the main compartment of the grinder, equipped with sharp teeth (or pegs) that do the actual grinding. The consistency of your ground weed largely depends on this chamber’s efficiency.
Kief Chamber (or Pollen Catcher): A key component for many users, the kief chamber is found mostly in multi-compartment grinders. It collects the fine pollen or kief that falls through a small screen from the grinding chamber. This kief is potent and often saved for a more concentrated experience.
Lid and Teeth: The lid is crucial for keeping your weed in place while grinding. In many grinders, the lid also contains teeth or pegs that work in tandem with those in the grinding chamber to break down the buds.
Screen (in multi-chamber grinders): Separating the grinding chamber from the kief chamber, the screen allows only the finest particles to pass through, ensuring that your kief is pure and free from plant material.
Pre-Cleaning Steps
Disassembling the Grinder: Before you dive into cleaning, it’s crucial to properly disassemble your grinder. This step is key to ensuring that every part gets thoroughly cleaned, especially when dealing with sticky plant residue.
- Empty the Grinder: Start by emptying any leftover plant material from the grinder. Tap it gently against a hard surface to loosen any stuck bits.
- Unscrew the Pieces: Carefully unscrew each part of the grinder. Most grinders come apart in several layers: the top lid, the grinding chamber, the screen, and the kief chamber. Keep them in order to make reassembling easier.
- Handle with Care: If you have a plastic or acrylic grinder, be gentle to avoid cracking or damaging the pieces. These grinders are more robust but still handle them with care to maintain their threads.
- Inspect Each Part: As you disassemble, inspect each part for wear and tear. Pay special attention to the teeth and the screen, as these are crucial for efficient grinding and kief collection.
Removing Loose Debris
Once your grinder is disassembled, the next step is to remove any loose debris. This is important because you want to clear out as much dry residue as possible before introducing any cleaning liquids, which can turn loose particles into a muddy mess.
- Tap and Brush: Gently tap the pieces over a paper plate or a clean surface to shake off loose plant material. Use a small brush or an old toothbrush to dislodge particles stuck in the teeth and crevices.
- Use a Toothpick or Q-tip: For those hard-to-reach areas, especially around the teeth and screen, use a toothpick or a Q-tip. This is particularly effective for plastic or acrylic grinders where brushing too hard might cause damage.
- Check the Kief Chamber: Don’t forget the kief chamber. Sometimes kief can get compacted. Use a non-metallic scraper (to avoid scratching) to gently collect any kief. This is your precious stash, so save it for later use!
Cleaning Metal Grinders
Soaking in Isopropyl Alcohol
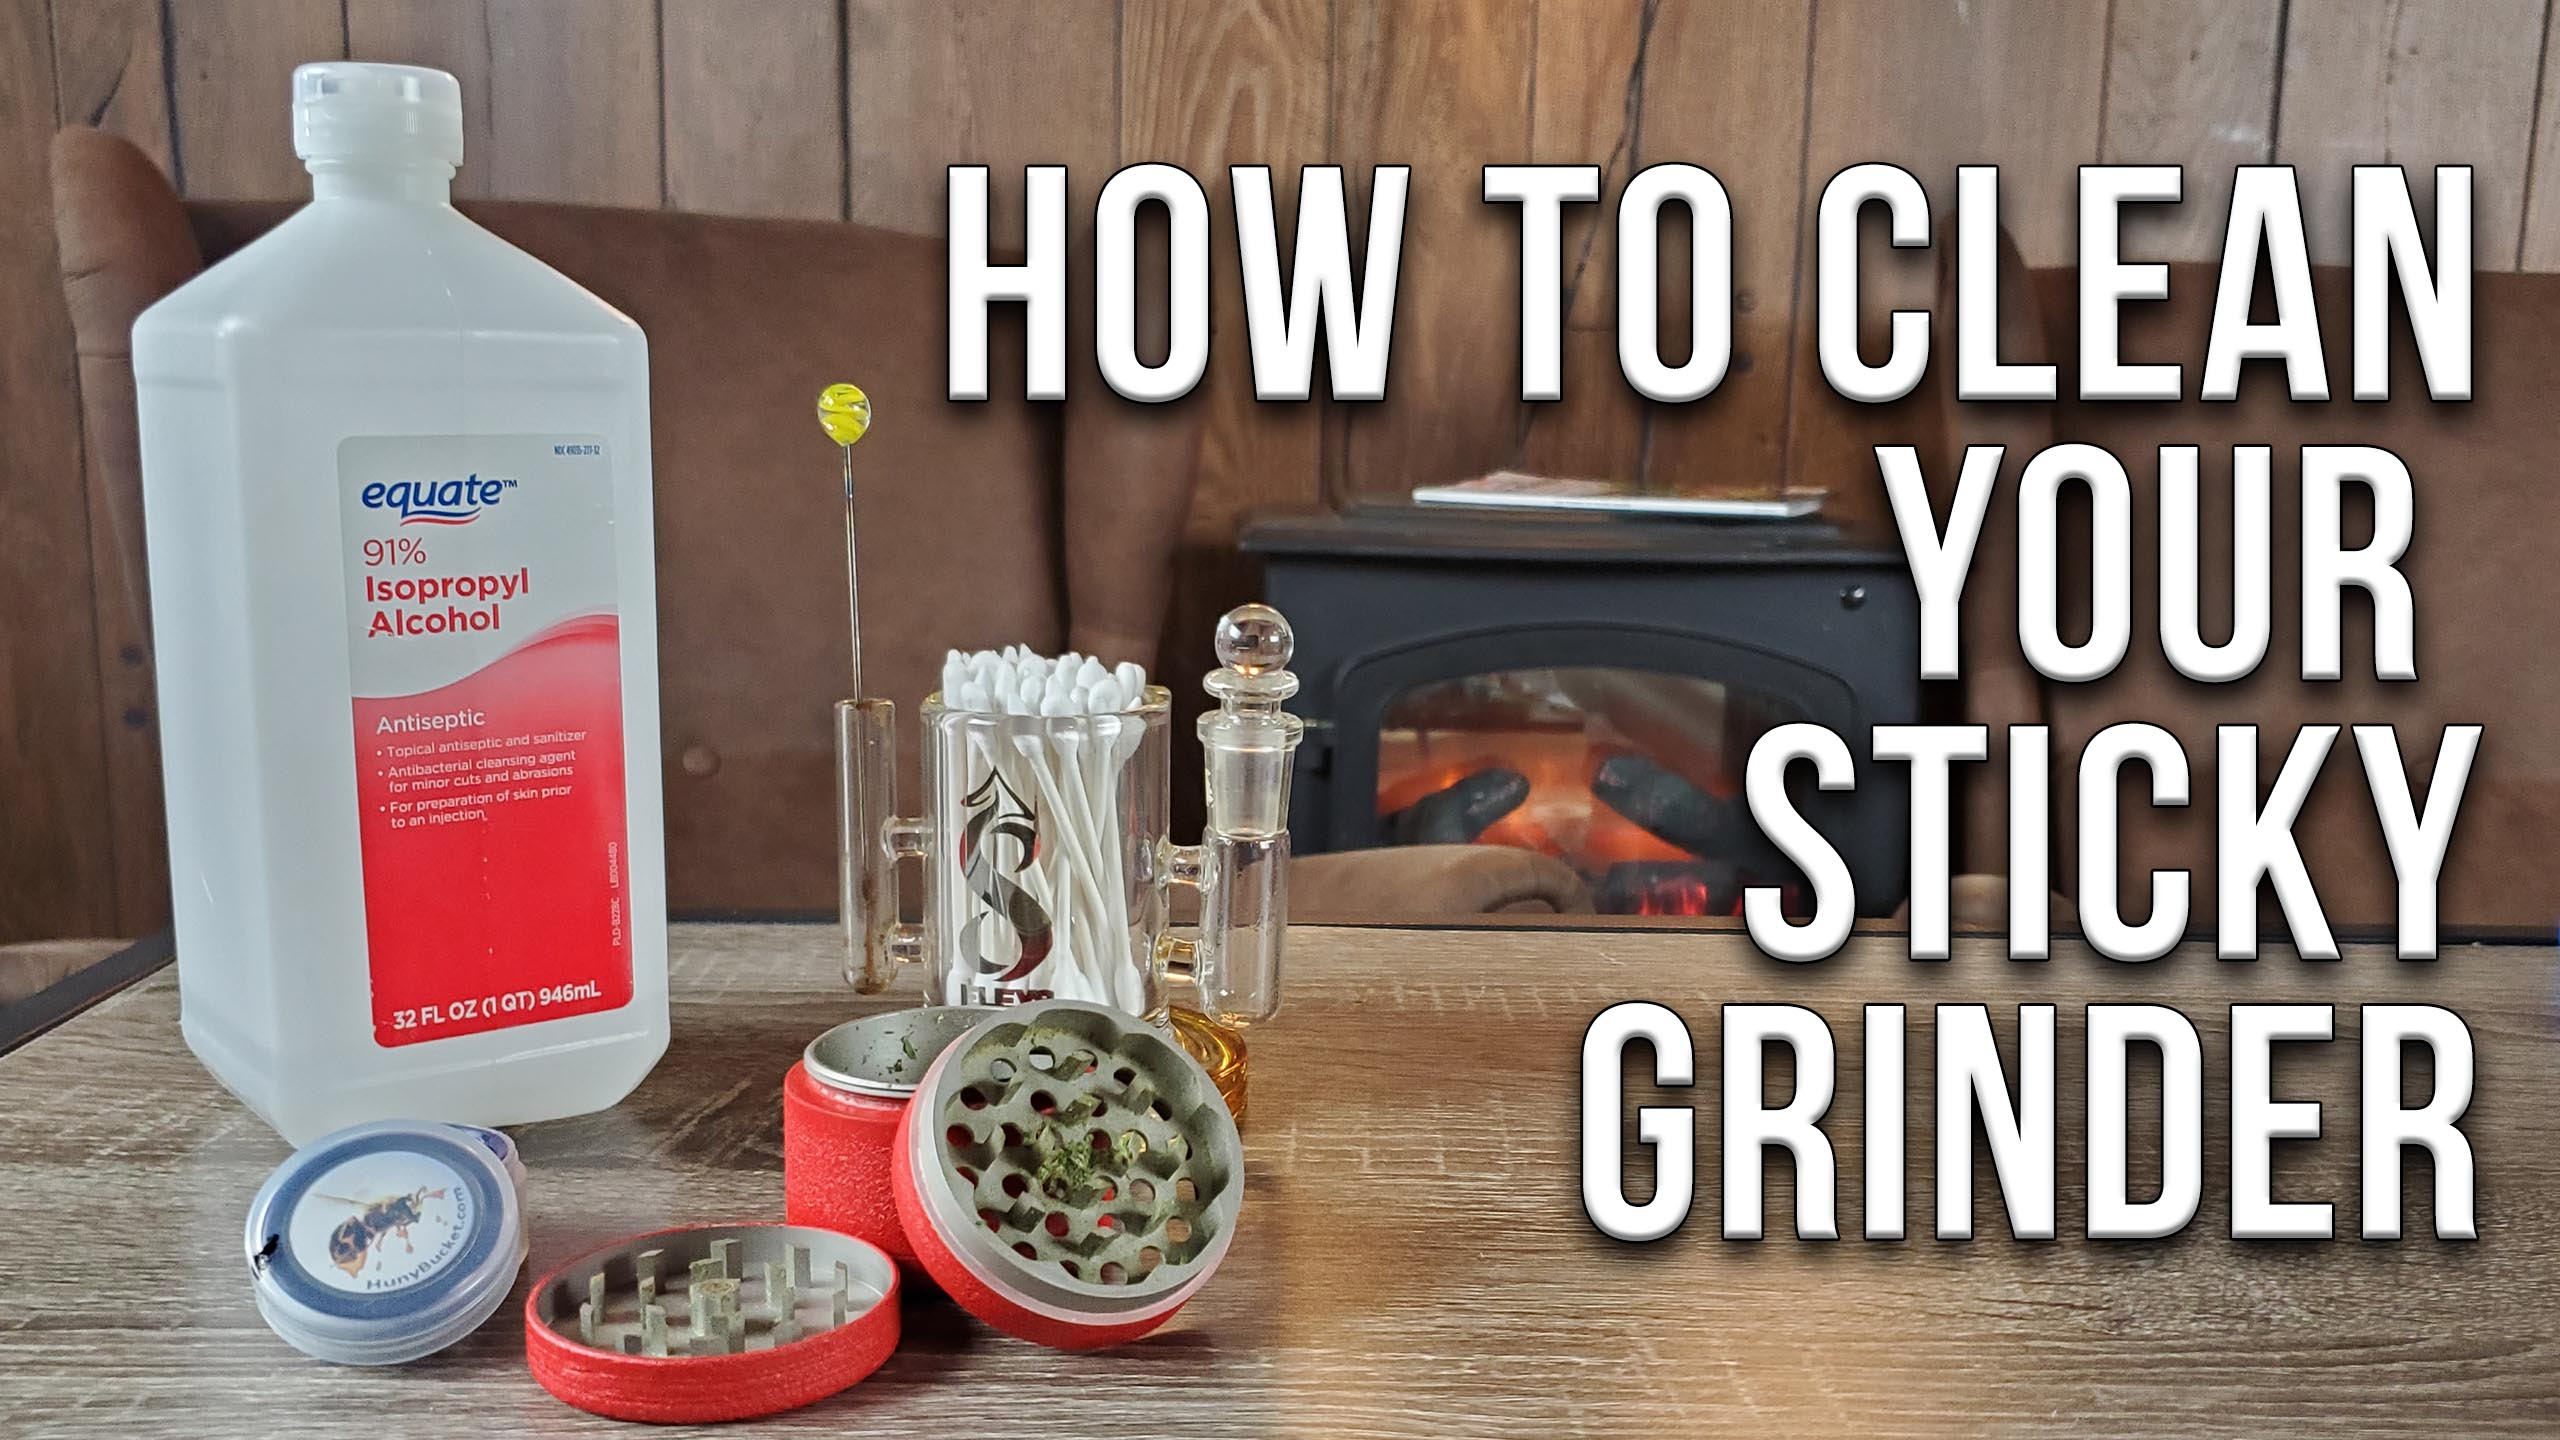
Metal grinders are best cleaned using rubbing alcohol, known for its effectiveness in dissolving stubborn resin and plant residues. Here’s how to do it:
- Choose the Right Concentration: Aim for rubbing alcohol with at least 70% concentration, ideal for cleaning without being too harsh.
- Preparation: In a container large enough to hold all the pieces of your grinder, pour enough isopropyl alcohol to fully submerge them. Ensure the room is well-ventilated, as the fumes from the alcohol can be strong.
- Soaking: Place the disassembled grinder pieces into the alcohol. Let them soak for at least 30 minutes to a few hours, depending on how dirty the grinder is. The alcohol will loosen the sticky residue and make it easier to clean. It is best to have a paper towel handy for cleaning.
- Safety Precautions: While isopropyl alcohol is excellent for cleaning, it’s also flammable. Avoid using it near open flames and don’t smoke while cleaning your grinder.
Scrubbing and Rinsing
After soaking, it’s time to scrub away the loosened residues:
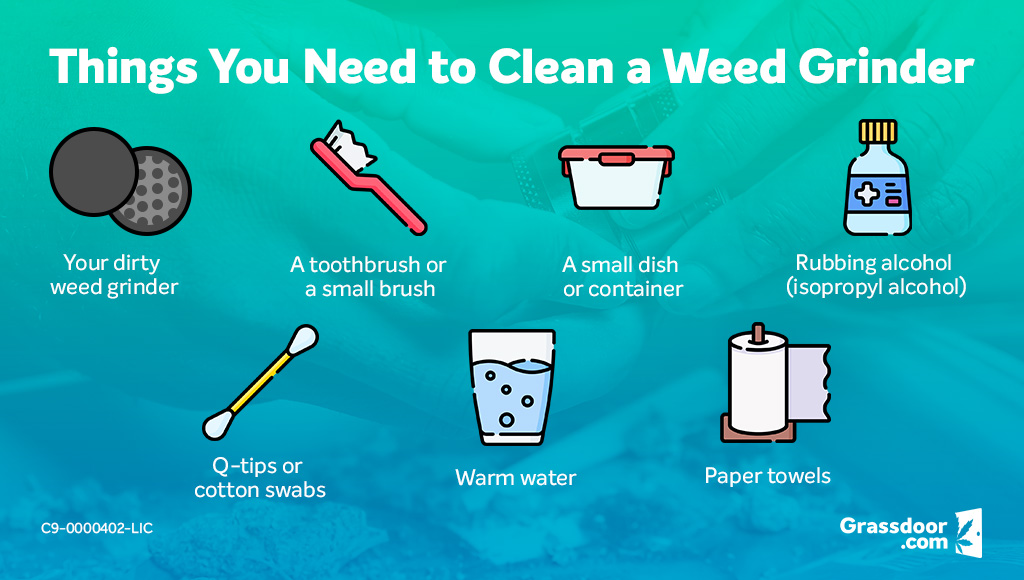
- Gather Your Tools: Arm yourself with an old toothbrush, Q-tips, and any other small brushes. These tools are great for reaching into tight spaces and scrubbing effectively.
- Scrubbing Technique: Start scrubbing each piece individually. Pay special attention to the teeth and the corners where residues often hide. For the screen and kief chamber, use a softer brush or Q-tip to avoid damage.
- Rinsing: Once you’ve scrubbed everything, rinse each piece under warm water. This step is crucial to remove all traces of alcohol and dislodged residues.
- Inspect and Repeat if Necessary: After rinsing, inspect each piece. If you still see residues, repeat the soaking and scrubbing process.
- Dry Thoroughly: Ensure all pieces are completely dry before reassembling your grinder. Any moisture left can lead to rust or mold, which is harmful when smoking.
Why Not to Use Rubbing Alcohol
For those with plastic or acrylic grinders, the cleaning approach differs significantly from aluminum grinders, particularly when it comes to the use of isopropyl alcohol. Here’s why:
- Chemical Reaction: Isopropyl alcohol can cause a chemical reaction with plastic or acrylic materials, leading to deterioration. This reaction can make your grinder brittle, increasing the risk of cracks or breakages.
- Safety Concerns: Besides damaging the grinder, the combination of isopropyl alcohol and plastic can release harmful fumes, posing a health risk.
Alternative Cleaning Methods for a Clean Grinder
Given these risks, it’s best to opt for gentler cleaning methods for your plastic or acrylic grinders. Here are two effective methods:
Using Dish Soap and Warm Water:
- Preparation: Mix a few drops of dish soap in a bowl of warm water. The soap will help break down the oily residues without damaging the plastic.
- Soak and Scrub: Submerge the grinder pieces in the soapy water. Let them soak for about 10-15 minutes. Then, using a soft-bristled brush (like a toothbrush) or a sponge, gently scrub each piece. Focus on the teeth and the areas where residue accumulates.
- Rinse Thoroughly: After scrubbing, rinse each piece under running water to wash away the soap and loosened debris. Ensure no soap residue is left, as it can affect the taste of your weed.
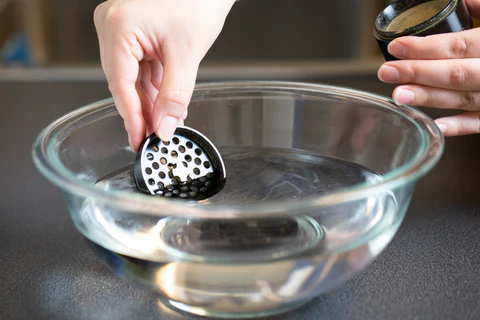
The Boiling Water Method:
- Boil Water: Bring a pot of water to a boil. The hot water is effective in loosening tough residues.
- Submerge Grinder Pieces: Turn off the heat and carefully place your grinder pieces in the hot water. Let them sit for a few minutes. The heat will help loosen any stuck plant matter.
- Remove and Scrub: Carefully remove the pieces from the water (they will be hot) and scrub them with a brush or sponge. This method is particularly effective for hard-to-clean residues.
- Rinse and Dry: Rinse each piece under cool water and dry them thoroughly before reassembling your grinder.
Keeping your weed grinder clean is not just a chore; it’s an essential part of your cannabis routine. A clean grinder is pivotal for several reasons.
Firstly, it ensures that you get a consistent, smooth grind every time, which directly impacts the quality of your smoking experience. Residue build-up can lead to unevenly ground weed, affecting how it burns and, consequently, the taste and potency.
Secondly, regular cleaning extends the life of your grinder. Whether it’s a robust metal grinder or a more delicate acrylic one, keeping it clean prevents wear and tear, ensuring it stays functional for years. This not only saves you money in the long run but also means you can rely on your grinder whenever you need it.
Lastly, a clean grinder is a healthier grinder. Accumulated plant material can become a breeding ground for bacteria and mold, which you certainly don’t want to mix with your weed. By keeping your grinder clean, you’re not only enhancing your smoking experience but also taking care of your health.
FAQs
Q: How often should I clean my grinder?
A: The frequency depends on how often you use your grinder. A good rule of thumb is to give it a basic clean every few weeks and a deep clean every few months. However, if you notice it’s getting sticky or difficult to turn, it’s time for a clean. It is important to clean your grinder often and keep plant matter to a minimal and avoid resin buildup.
Q: What are the best products for cleaning a grinder?
A: For metal grinders, isopropyl alcohol is the go-to for a deep clean. For plastic or acrylic grinders, avoid alcohol and opt for mild dish soap and warm water or the boiling water method.
Q: Can I use vinegar to clean my grinder?
A: Yes, you can use vinegar, especially for metal grinders. It’s a good natural alternative to isopropyl alcohol. Soak the grinder parts in a mixture of vinegar and water, then scrub and rinse thoroughly.
Q: Is it safe to clean my grinder in the dishwasher?
A: It’s not recommended, especially for plastic grinders, as the heat can warp the plastic. Metal grinders might withstand a dishwasher cycle, but hand washing is safer and more effective.